
最新方案
流程图 & 原理介绍
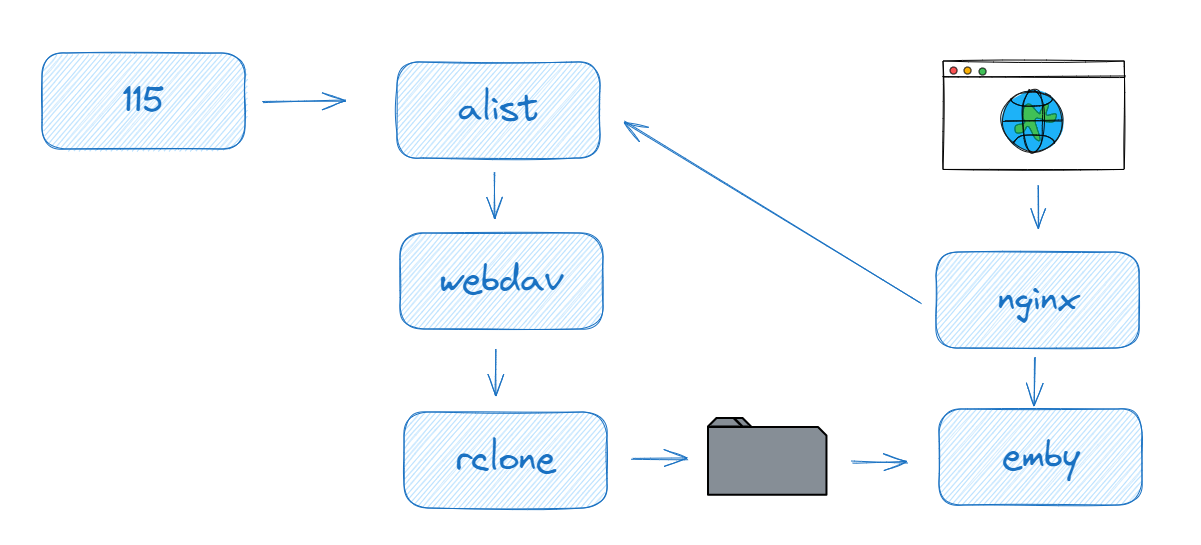
通过 alist 将 115 网盘资源转成可以通过网络编辑和管理 webdav 协议。
通过 rclone 将 webdav 协议的资源挂载到本地硬盘
embyserver 读取、刮削、入库 「2」 挂载好的资源
安装 nginx 实现对访问 embyserver 的流量进行转发、重写。将: 静态资源转发到 embyserver 服务上,视频资源的访问直接转发到 alist,从而利用 alist 的 302 转发实现直接访问网盘资源。(如图,少走了 alist -> webdav -> rclone -> emby 的过程,实现不走主机流量,直连网盘)
安装
测试服务器: 阿里云服务器
测试环境: 纯 docker
建议跟着我的步骤来,打开一个记事本,记录所有教程中要求记下的值(我会以红色标记)
安装 alist
docker run -d --restart=always -v /home/alist:/opt/alist/data -p 5244:5244 -e PUID=0 -e PGID=0 -e LMASK=022 --name=alist xhofe/alist:latest设置密码
docker exec -it alist ./alist admin set password记录 alist 帐号密码,示例: admin, password
访问 http://外网ip:5244, 登录管理后台,添加 115 网盘,按需配置,对配置项不太理解的朋友建议直接抄我的
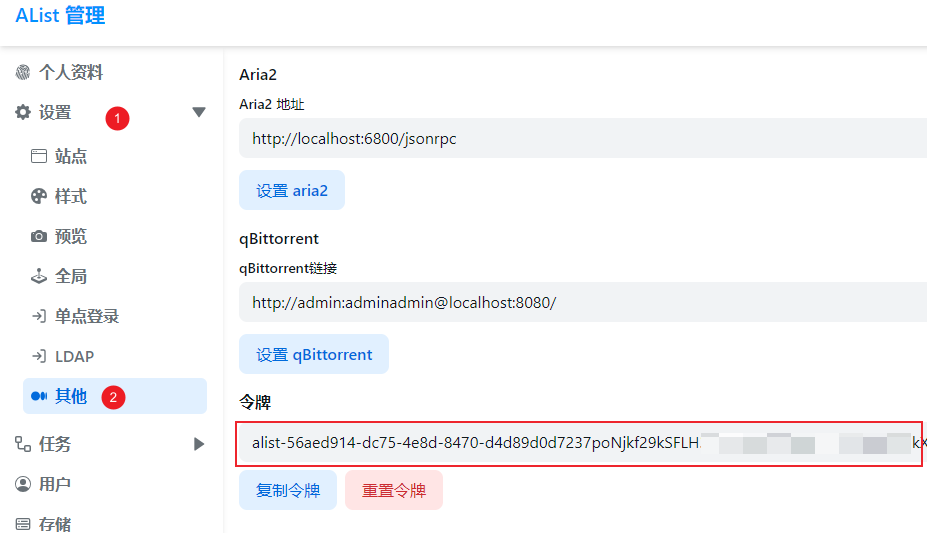
记录: alist 外网地址,示例: http://119.119.119.119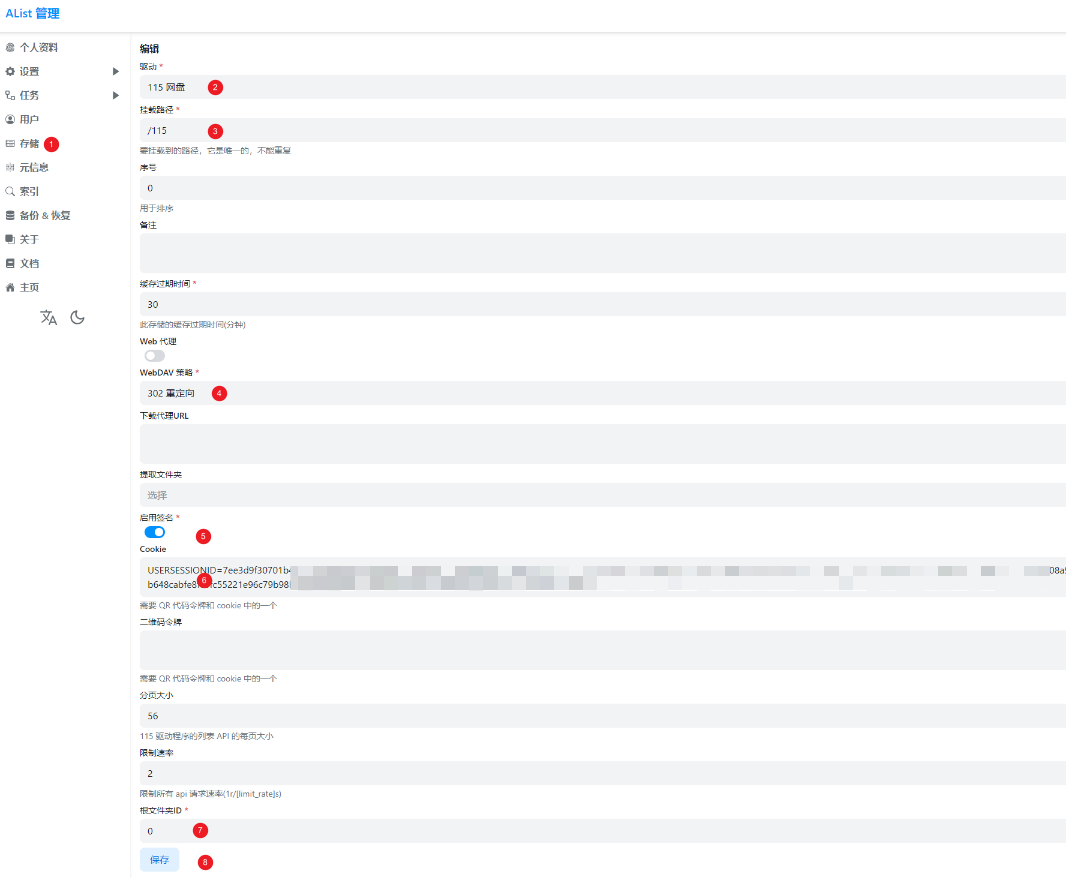 记录 alist token 值,示例: alist-56aed914-dc75-4exxxxx
记录 alist 内网 IP 地址,示例: 172.17.0.2
docker inspect --format="{{.NetworkSettings.Networks.bridge.IPAddress}}" alist安装 rclone
curl https://rclone.org/install.sh | sudo bash根据机器配置和环境,要运行一段时间
待安装完毕,生成 rclone 配置
cd /root && rclone config步骤如下
----------[n](新建一个配置)---------------------
No remotes found, make a new one?
n) New remote
s) Set configuration password
q) Quit config
n/s/q> n

----------[alist](名称)---------------------
Enter name for new remote.
name> alist

-----------[webdave](协议)---------------------------------
Option Storage.
Type of storage to configure.
Choose a number from below, or type in your own value.
 1 / 1Fichier
   \ (fichier)
 2 / Akamai NetStorage
   \ (netstorage)
 3 / Alias for an existing remote
   \ (alias)
 4 / Amazon Drive
   \ (amazon cloud drive)
 5 / Amazon S3 Compliant Storage Providers including AWS, Alibaba, ArvanCloud, Ceph, ChinaMobile, Cloudflare, DigitalOcean, Dreamhost, GCS, HuaweiOBS, IBMCOS, IDrive, IONOS, LyveCloud, Leviia, Liara, Linode, Minio, Netease, Petabox, RackCorp, Rclone, Scaleway, SeaweedFS, StackPath, Storj, Synology, TencentCOS, Wasabi, Qiniu and others
   \ (s3)
 6 / Backblaze B2
   \ (b2)

-------[http://172.17.0.2:5244/dav/](这里的 172.17.0.2 用上面记录的 alist 内网地址替换)------
Option url.
URL of http host to connect to.
E.g. https://example.com.
Enter a value.
url> http://172.17.0.1:5244/dav/

-------[other]------
Option vendor.
Name of the WebDAV site/service/software you are using.
Choose a number from below, or type in your own value.
Press Enter to leave empty.
 1 / Fastmail Files
   \ (fastmail)
 2 / Nextcloud
   \ (nextcloud)
 3 / Owncloud
   \ (owncloud)
 4 / Sharepoint Online, authenticated by Microsoft account
   \ (sharepoint)
 5 / Sharepoint with NTLM authentication, usually self-hosted or on-premises
   \ (sharepoint-ntlm)
 6 / rclone WebDAV server to serve a remote over HTTP via the WebDAV protocol
   \ (rclone)
 7 / Other site/service or software
   \ (other)
vendor> other

-------[admin](这里的 admin 用上面记录的 alist 帐号替换)------
Option user.
User name.
In case NTLM authentication is used, the username should be in the format 'Domain\User'.
Enter a value. Press Enter to leave empty.
user> admin

-------[y](我要自己填写密码)------
Option pass.
Password.
Choose an alternative below. Press Enter for the default (n).
y) Yes, type in my own password
g) Generate random password
n) No, leave this optional password blank (default)
y/g/n> y

-------[password](这里的 password 用上面记录的 alist 密码替换,记得要输两遍)------
Option user.
User name.
In case NTLM authentication is used, the username should be in the format 'Domain\User'.
Enter a value. Press Enter to leave empty.
user> admin

Option pass.
Password.
Choose an alternative below. Press Enter for the default (n).
y) Yes, type in my own password
g) Generate random password
n) No, leave this optional password blank (default)
y/g/n> y
Enter the password:
password:
Confirm the password:
password:

-------[](这里直接回车)------
Option bearer_token.
Bearer token instead of user/pass (e.g. a Macaroon).
Enter a value. Press Enter to leave empty.
bearer_token>

-------[n](使用默认配置)------
Edit advanced config?
y) Yes
n) No (default)
y/n> n

-------[y](保存)------
Configuration complete.
Options:
- type: webdav
- url: http://172.17.0.2:5244/dav/
- vendor: other
- user: admin
- pass: *** ENCRYPTED ***
Keep this "alist" remote?
y) Yes this is OK (default)
e) Edit this remote
d) Delete this remote
y/e/d> y

-------[q](退出)------
Current remotes:

Name                 Type
====                 ====
alist                webdav

e) Edit existing remote
n) New remote
d) Delete remote
r) Rename remote
c) Copy remote
s) Set configuration password
q) Quit config
e/n/d/r/c/s/q> q
运行 docker 容器,挂载 115 资源到本地
docker run -d --restart=always --name=rclone --volume /root/.config/rclone:/config/rclone --volume /mnt/alist:/data/mount:shared --device /dev/fuse --cap-add SYS_ADMIN --security-opt apparmor:unconfined rclone/rclone mount alist: /data/mount --allow-other --allow-non-empty --read-only --vfs-read-chunk-size=4M --buffer-size=32M如果一切顺利,执行下面的命令,你将能看到一个名为 115 的目录,里面是你网盘里面的内容
ls -lah /mnt/alist安装 embyserver
# 如果你只想通过 nginx 反代后的访问可以不开端口
docker run -d --restart=always --name emby -p 8096:8096 -e TZ=Asia/Shanghai -e PUID=0 -e PGID=0 -v /home/emby:/config --volume /mnt/alist:/mnt/alist:shared emby/embyserver:latest
记录 embyserver 的内网地址,示例: 172.17.0.3
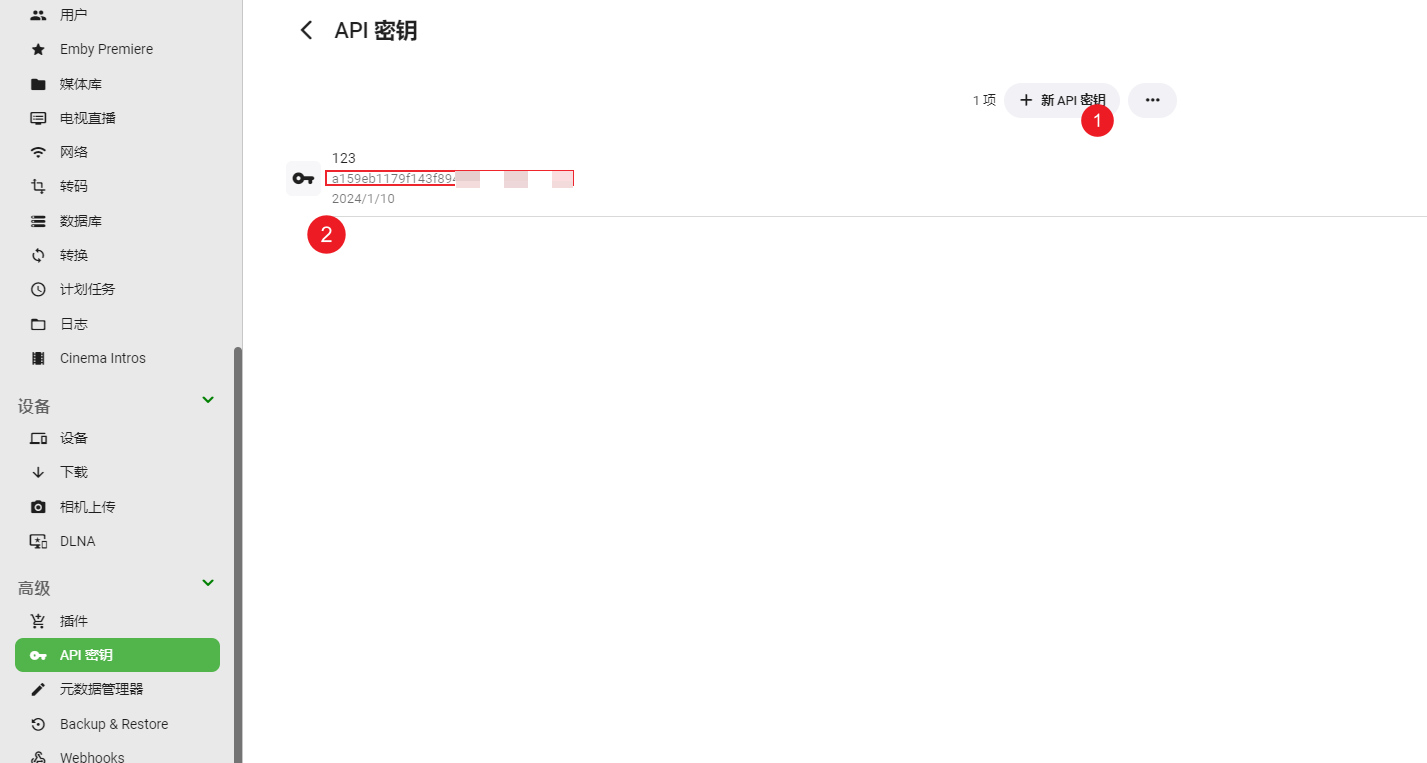
docker inspect --format="{{.NetworkSettings.Networks.bridge.IPAddress}}" emby创建 & 记录 embyserver 的 APIKEY,示例: a159ebxxxxxx
访问 http://外网ip:8096, 初始化 emby,生成并记录 embyserver 的 API KEY
 其他配置
其他配置
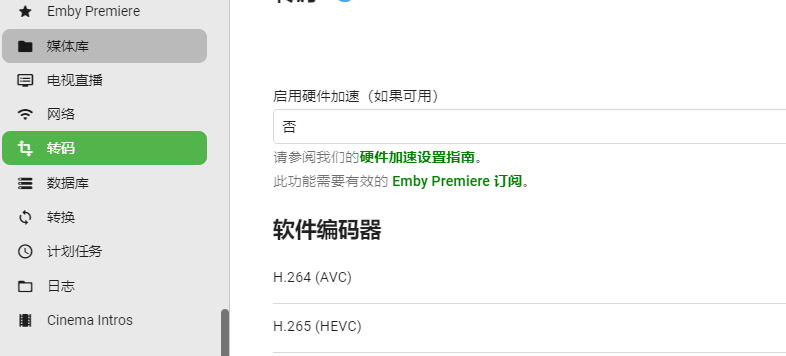
关闭转码等
安装 nginx
生成配置文件
mkdir /home/nginx && docker run -d --name nginx registry.cn-shenzhen.aliyuncs.com/hicane/emby-nginx:latest&& docker cp nginx:/etc/nginx/conf.d/constant.js /home/nginx/constant.js && docker stop nginx && docker rm nginx修改配置
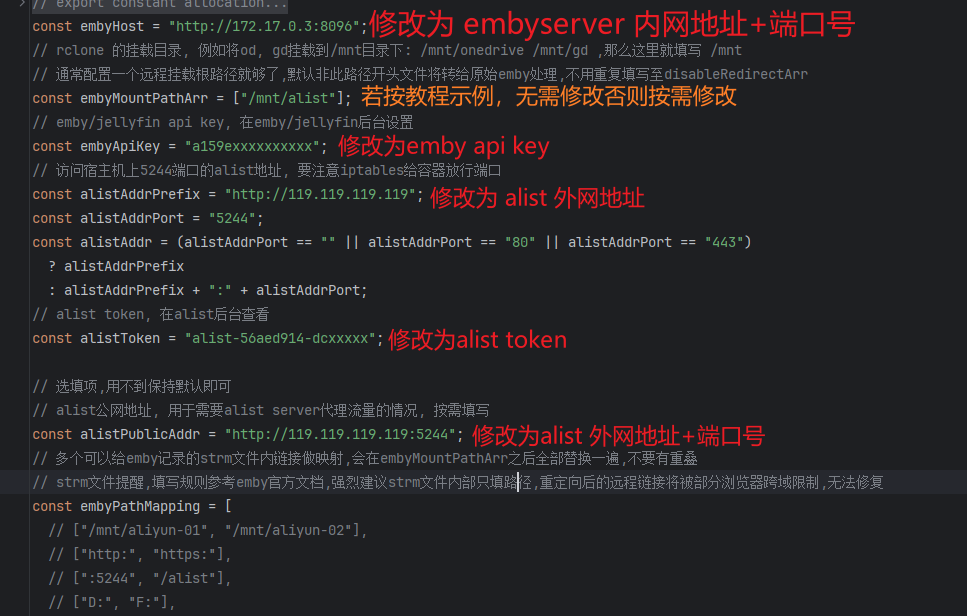
在 /home/nginx 目录下,有一个 constant.js 文件,按需修改
 创建 & 运行容器
docker run -d -p 8097:80 --name nginx -v /home/nginx/constant.js:/etc/nginx/conf.d/constant.js -v /home/nginx/embyCache:/var/cache/nginx/emby registry.cn-shenzhen.aliyuncs.com/hicane/emby-nginx:latest播放
网页版
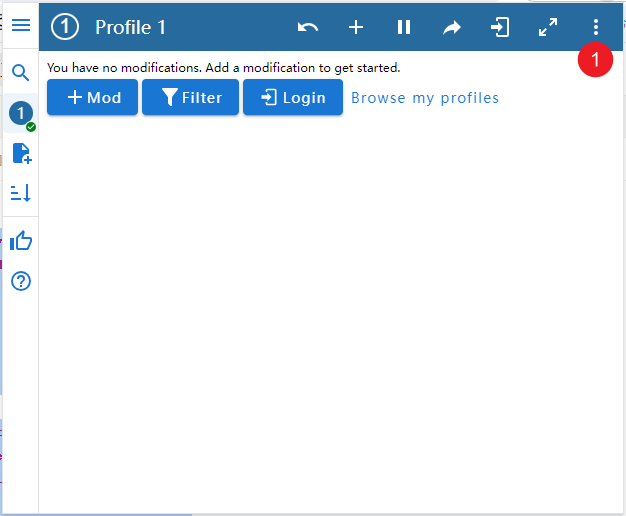
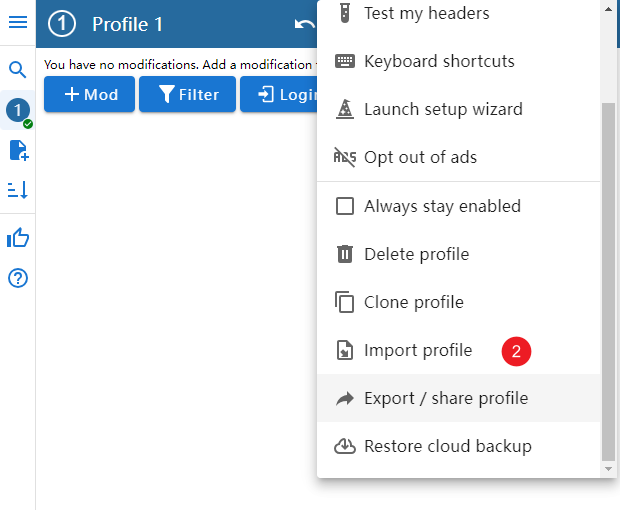
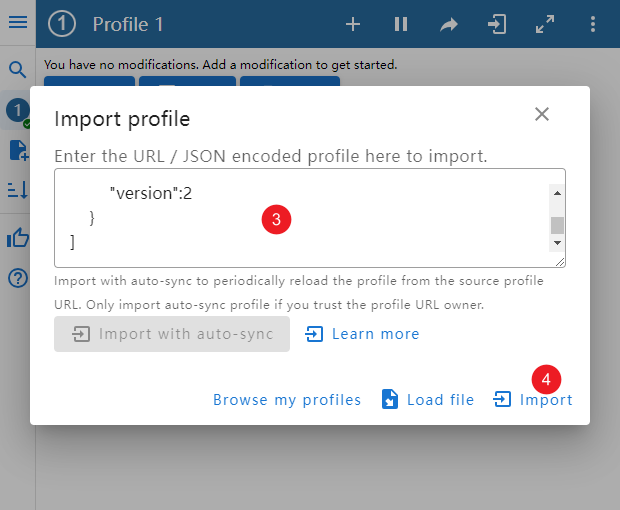
我这里网页版一直播放不成功,不过 nginx 脚本作者说可以通过安装 modify header 解决跨域问题来播放
[
    {
        "alwaysOn":true,
        "respHeaders":[
            {
                "enabled":true,
                "name":"Access-Control-Allow-Origin",
                "value":"*"
            }
        ],
        "shortTitle":"1",
        "title":"CORS Support",
        "urlFilters":[
            {
                "enabled":true,
                "urlRegex":"*.115.com"
            }
        ],
        "version":2
    }
]
亲测无效,不知是哪里出了问题,有需要的可以测试一下
客户端
需要注意的是,要连接的是 nginx 的端口号,而不是 embyserver 的端口号
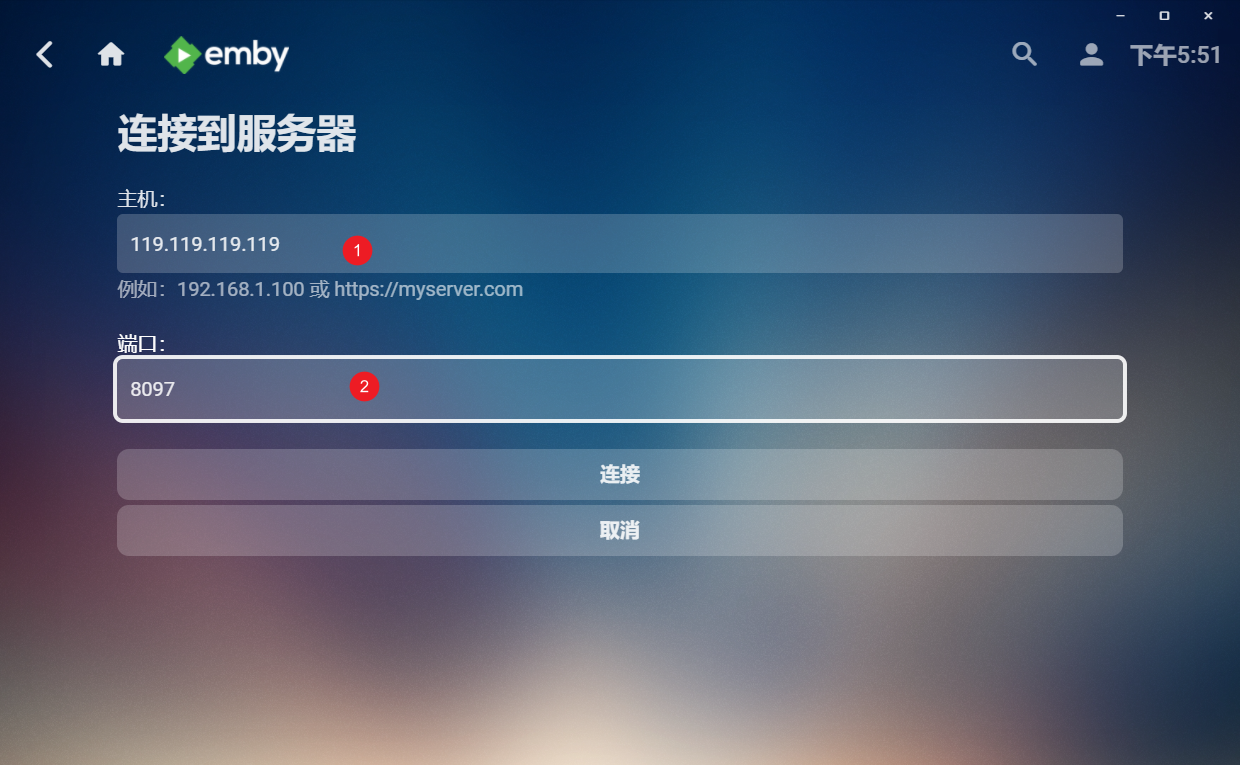 经测试,客户端是走的 115 直链,播放速度可达最大带宽(我的测试服务器带宽只有 5Mbps)

评论